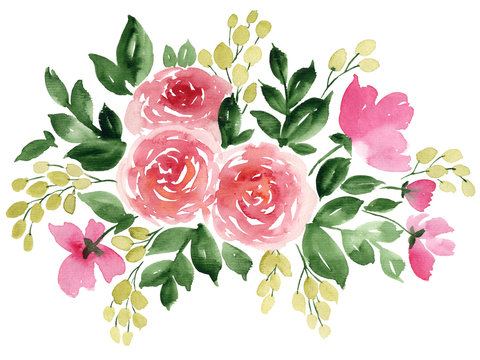
Quick + Easy Loose Watercolor Floral Tutorial
Hey! I’m so excited to share a loose watercolour floral tutorial with the Archer & Olive primary watercolor palette. By now it is probably clear that I am obsessed with floral watercolor illustrations! So, I thought it was only fitting to create another floral watercolor tutorial that you can follow in under 10 minutes
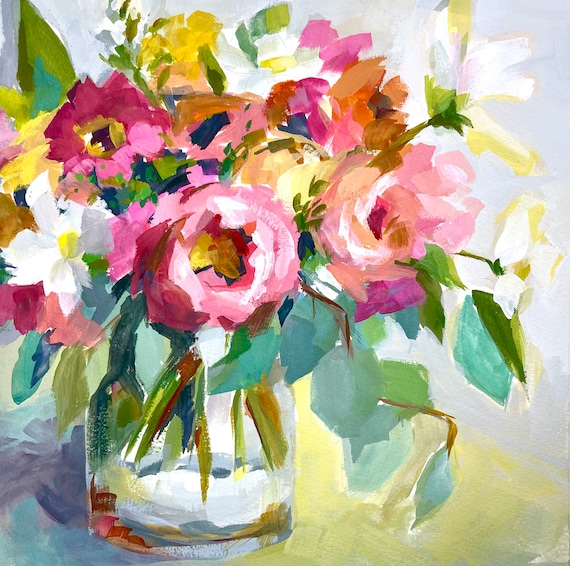
Hey friends, it’s Sarah from @essjay_florals and I’m so excited to share this tutorial to create loose watercolour florals with the Primary paints from Archer & Olive. By now it is probably clear that I am obsessed with florals and watercolours! So, I thought it was only fitting to create another tutorial that involves both! And to make it even more fun I wanted it to be a quick tutorial, less than 10 minutes in total! I find forcing yourself to create in quick bursts like this can be a helpful little tool to help free you up and get you out of your head and just create. So, let’s quickly get into it!
Here are the materials I used:
A&O 6 pan watercolor Set: Primaries
Magenta
Yellow
Green
Blue
A&O B5 watercolor Notepad
Round paintbrushes (size 8)
6H Pencil
Remember you can use my affiliate code SARAH10 to get a discount on your Watercolours, Watercolour notepads or any other Archer and Olive products!
1. Sketch in your layout
First pencil in a rough composition, or use my printable. I find the best thing to do is place circles for your flowers and then add leaves in to fill the space and to balance your piece. I chose to use a 6H pencil so that I didn’t have to worry (or erase) my lines after I painted. The other thing is when you paint over pencil with watercolour it creates a barrier so you can’t remove the pencil lines and as my lines were super rough, I thought it best to just go with a light outline. (This is why the above photo has digitally drawn outlines as the pencil lines were to faint to pick up)
2. Start your flowers
First, I use magenta watered down for a fluffy peony. Use the circle guide and from the centre paint a few blob-like petals (and yep, you did read that right, with loose watercolours I have found blobs placed together to be very much the way to go about painting your flowers).
3. Add some detail
Next, I add some extra petals to make it feel like a fluffy peony. Then I mix in yellow and dab it in the centre for the stamen.
4. More flowers
Now that I have a bit of a yellow/orange colour from mixing the magenta and yellow, I mix more magenta in to make a peach colour and begin painting the next flower. This time I made the petals look a bit more like petals and went with a more traditional flower shape.
5. Make the flower fuller
Next, I add in extra petals between the central petals to make the flower look fuller. Again, I mix in yellow and dab it in the centre for the stamen.
6. Add in your leaves
Finally, it’s time to add in your leaves and stems by using the guides. I mixed the green paint with a little blue and filled in those pencil leaves and stems.
7. Add some accent leaves
Once you have added your leaves and stem it’s time to add in some little leaves to give it more depth. And then you are done!
To watch the full process, check out this video:
If you’d like to try this composition, download the free printable to help with creating your very own loose watercolour florals.
I’d love to see your recreations or take on this tutorial, and don’t forget to tag myself at @essjay_florals & @archerandolive if you’d like to share.
Quick + Easy Loose Watercolor Floral Tutorial

Quick + Easy Loose Watercolor Floral Tutorial

Quick + Easy Loose Watercolor Floral Tutorial

Quick + Easy Loose Watercolor Floral Tutorial

Quick + Easy Loose Watercolor Floral Tutorial

Quick + Easy Loose Watercolor Floral Tutorial

Quick + Easy Loose Watercolor Floral Tutorial


/product/46/4603101/2.jpg?8274)